
Blackcurrant & Earl Grey Stripe Cake

Hello, and welcome to this year's Great British Bake Off bake along! I will be re-creating a bake from each episode (unless the tasks are just silly, in which case I’ll just make something else I fancy) and of course we’re starting with cake week, the best week! I loved all of the tasks from this episode and although I was sorely tempted to make a retro hedgehog cake, mint matchmakers and all, I decided that a vertical stripe cake might better fit my aesthetic.
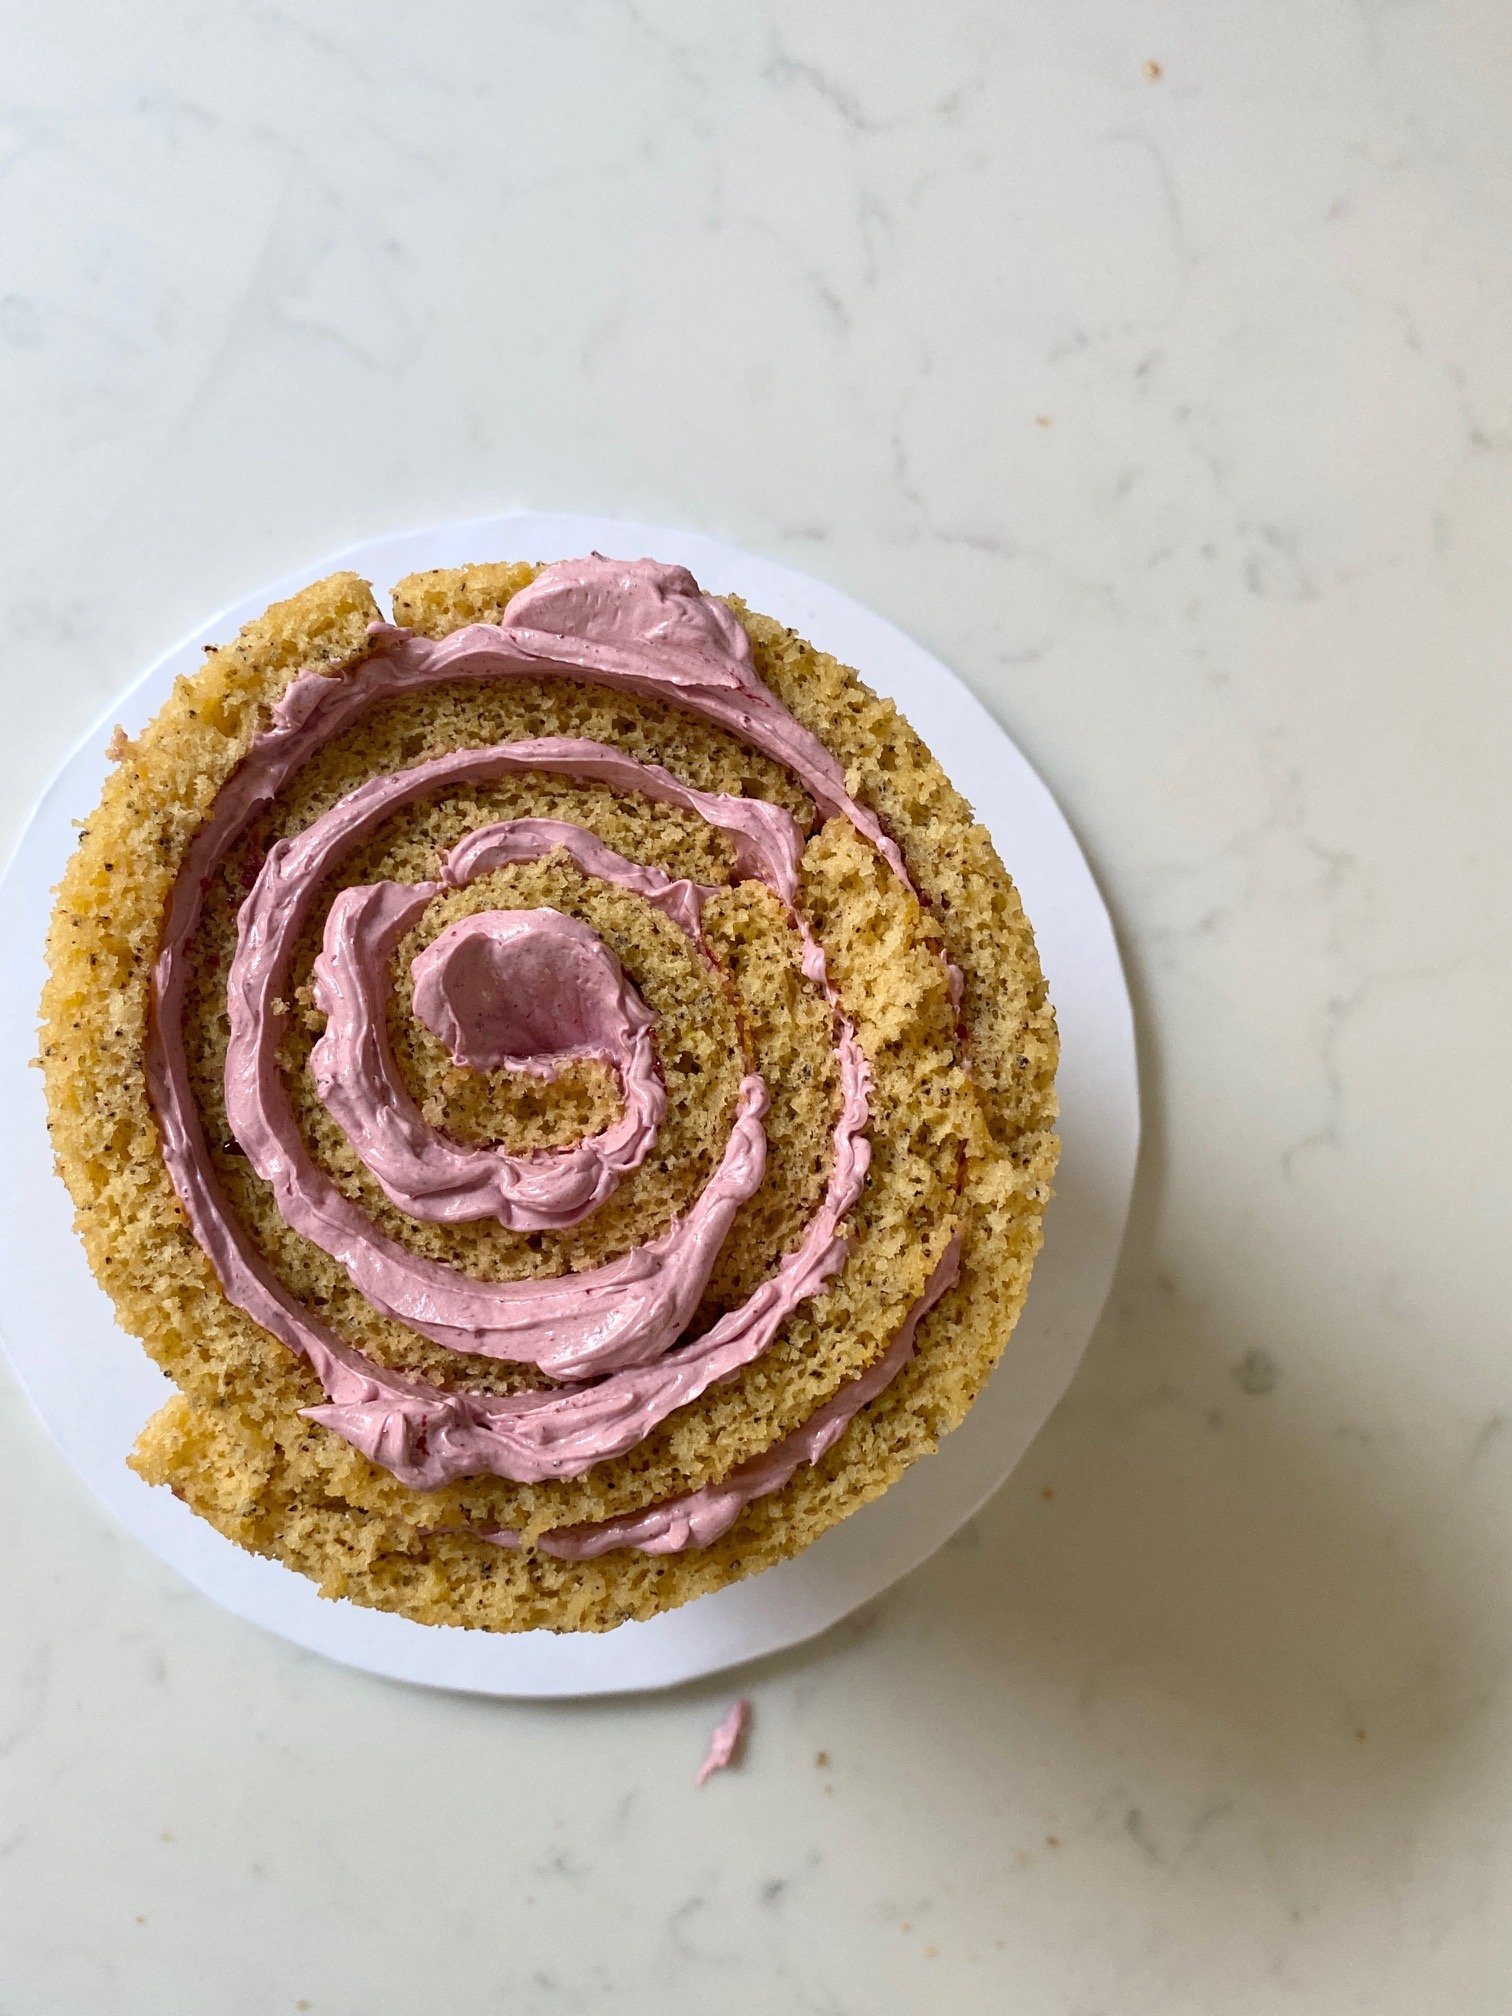
I’ve made many a swiss roll in my 10 years as a pastry chef but I had never made a vertical stripe cake so this was the perfect opportunity. I thoroughly enjoyed the process and it’s definitely something I would make again. This cake is somewhat fiddly but cutting the first slice and seeing the perfect stripes makes it a truly worthwhile endeavour.
Now onto flavours, I’m currently in the process of creating my 2024 cake menu and have been trialling some flavour combinations, this is one of my current favourites, the blackcurrant works beautifully with the earl grey and the rose just gives it a slightly floral note, I know rose isn’t for everyone so if it’s not your thing just leave it out. I’m also aware that blackcurrants can be somewhat tricky to get hold of, this recipe also works great with blackberries, it’s a more delicate flavour but still utterly delicious.
Alright enough of my blathering, lets get cracking. First up, equipment, for this recipe you’ll need 2 evenly sized baking trays, I used 40cm x 25cm, but the measurements don’t matter too much, as long as both of your trays are the same size you’ll be fine, I used a stand mixer but an electric hand mixer would also work. Although temperatures are mentioned in this recipe, a digital thermometer isn’t essential, these temperatures can be gaged by touch, however if you have one it will come in handy. For this recipe and all of my recipes you’ll need a set of digital scales, in pastry work accuracy is key and it’s really not even worth attempting them using cups.
Ingredients
Earl Grey Genoise
6 Large eggs
188g Sugar
35g Neutral oil, I used sunflower
1 Lemon zest
5g/1tsp Vanilla extract
188g Plain flour
2 Teabags Earl Grey
Earl Grey Syrup
1 teabag Earl Grey
50g Caster sugar
100ml Boiling water
½ lemon/25g Lemon Juice
Blackcurrant Swiss Meringue Buttercream
125g Egg white
250g Caster sugar
400g Soft unsalted butter
1/2tsp Rosewater
125g Blackcurrant puree*
*I used ready made frozen blackcurrant puree but to make it yourself, blend your blackcurrants/berries and pass through a sieve, if needed, add icing sugar to taste. I like mine quite tart as the buttercream already contains sugar.
To Decorate
Blackcurrant jam, store bought is fine, I’m not going to get into jam making in this recipe, I’ll save that for another day
Fresh, seasonal fruits, I’ve used blackberries and figs
Edible flowers
Method
Ok lets get going, we’re going to start with the genoise, pre-heat your oven to 180c and line your baking trays with parchment paper.
Next boil a pan of water and reduce the temperature so it’s just below a simmer. Crack your eggs into a metal bowl and add the sugar, place this over the pan of water and whisk until the mixture has reached 45°C or sugar is dissolved and warm to the touch, don’t get rid of your pan and water, we’ll use that again later! Transfer to a mixer and whisk on high for at least 5 minutes until the mixture has doubled in size and is pale and fluffy, once it gets to this stage, reduce the speed and leave for another 5 minutes, this reduces the size of the bubbles and makes the mixture more stable.

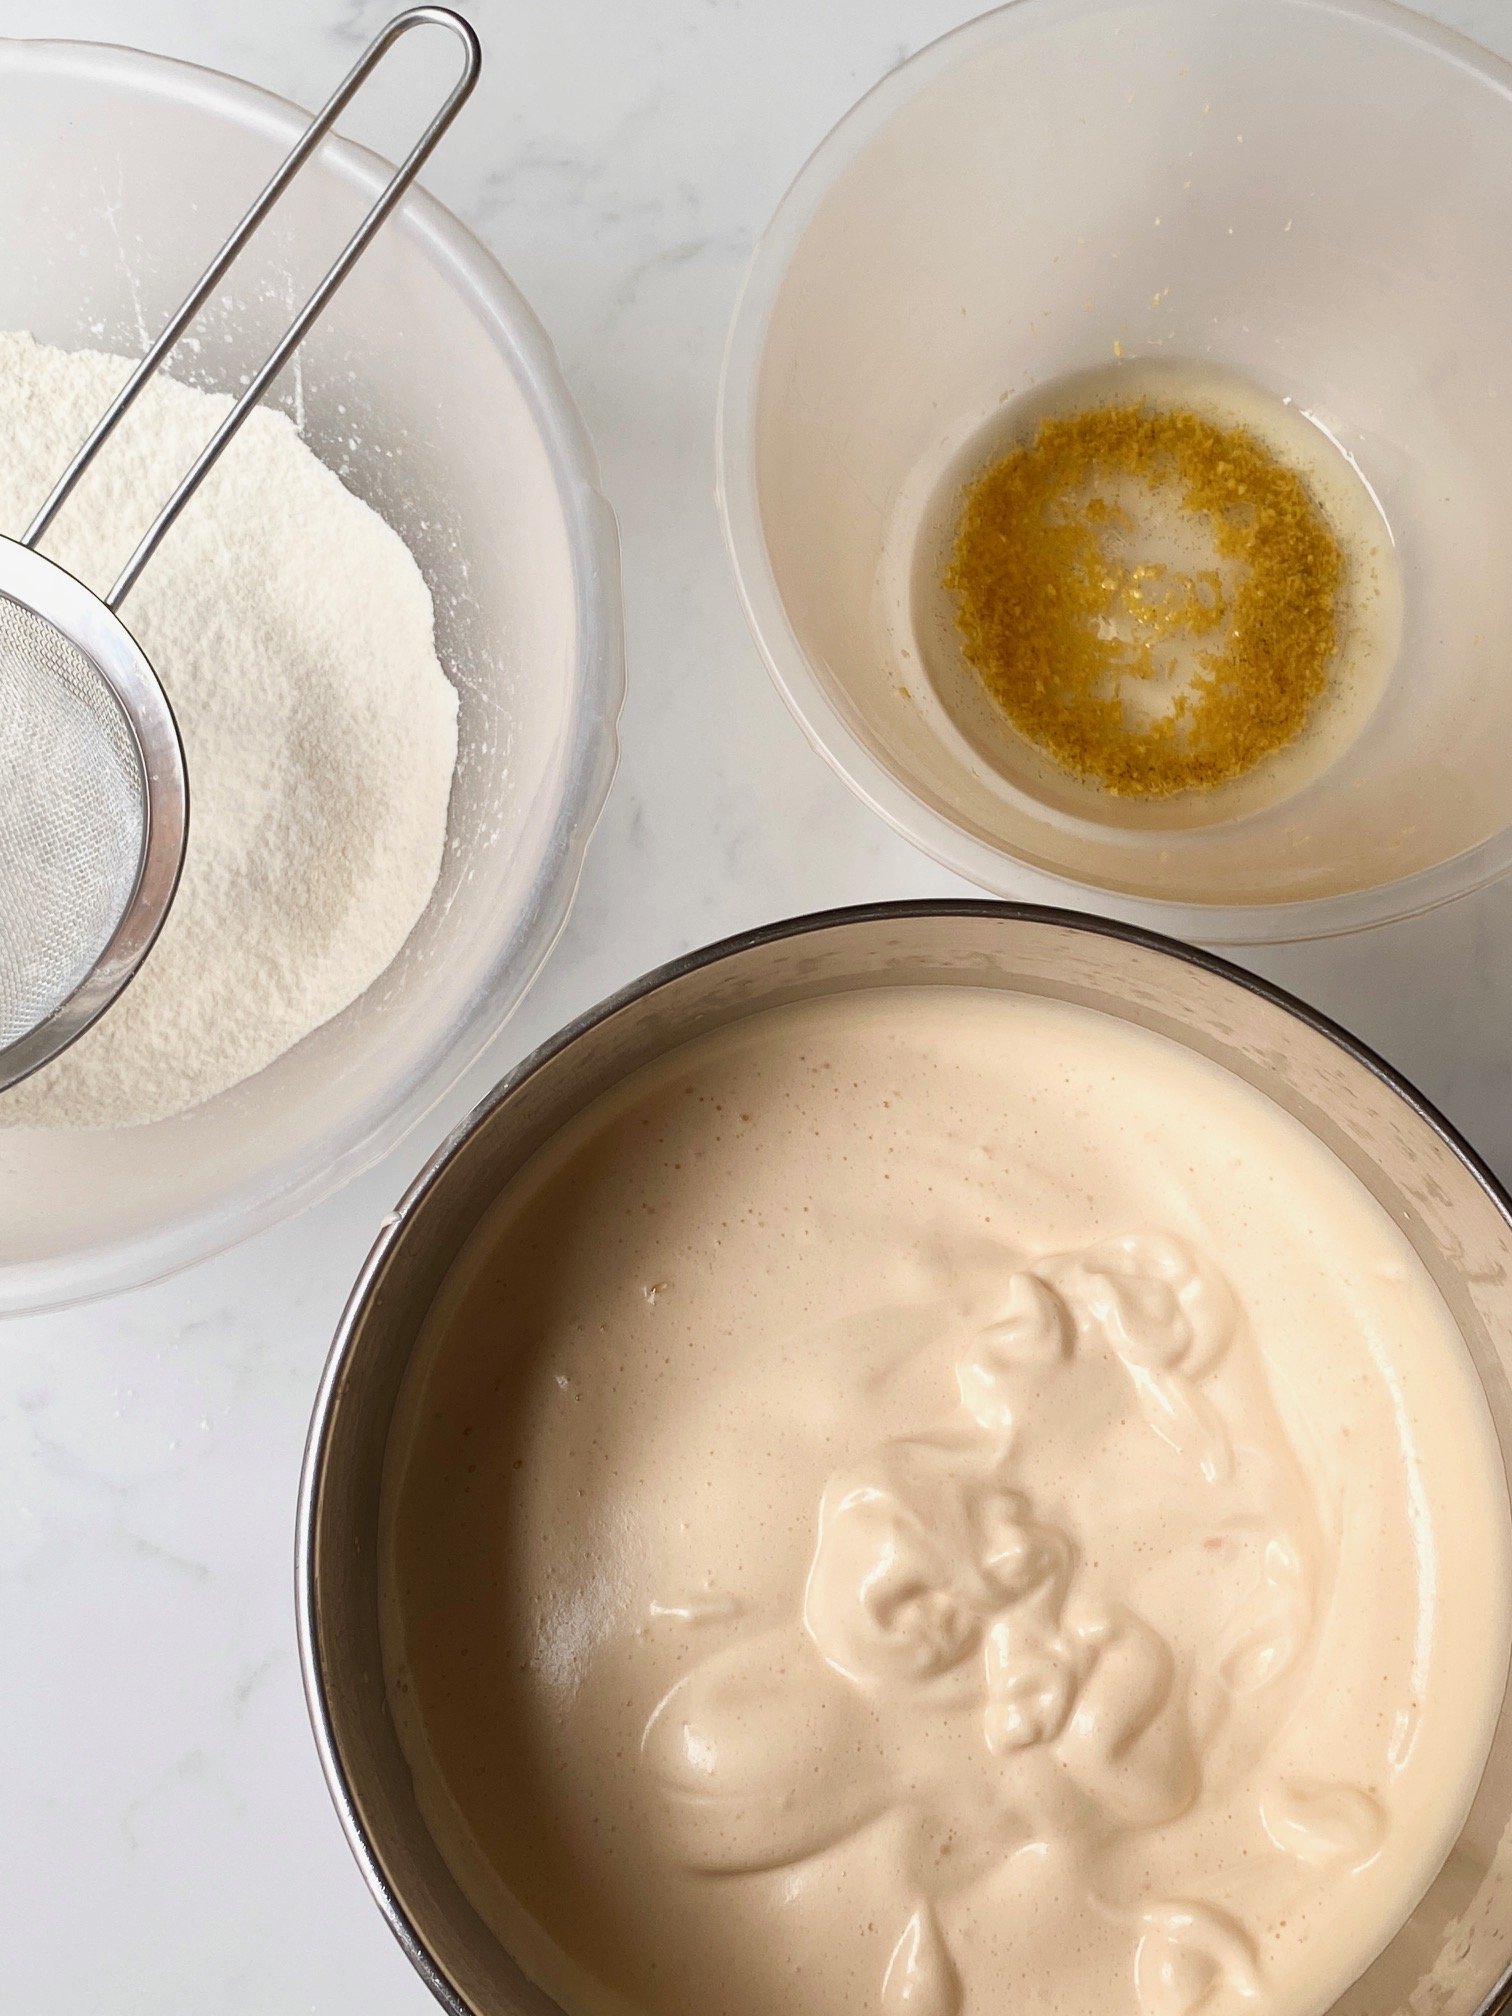
In another bowl weigh the oil, lemon zest, vanilla and earl grey, mix to combine. Add approximately ⅓ of the fluffy egg mixture and combine, don’t worry too much about knocking air out at this point. Add this back into the fluffy eggs but don’t stir yet!
Next sieve the flour on bit by bit, folding after each addition, to avoid lumps only add a small amount of flour at a time, if the mix is still looking lumpy folding with a whisk rather than a spatula can help, just be careful not to lose too much air.
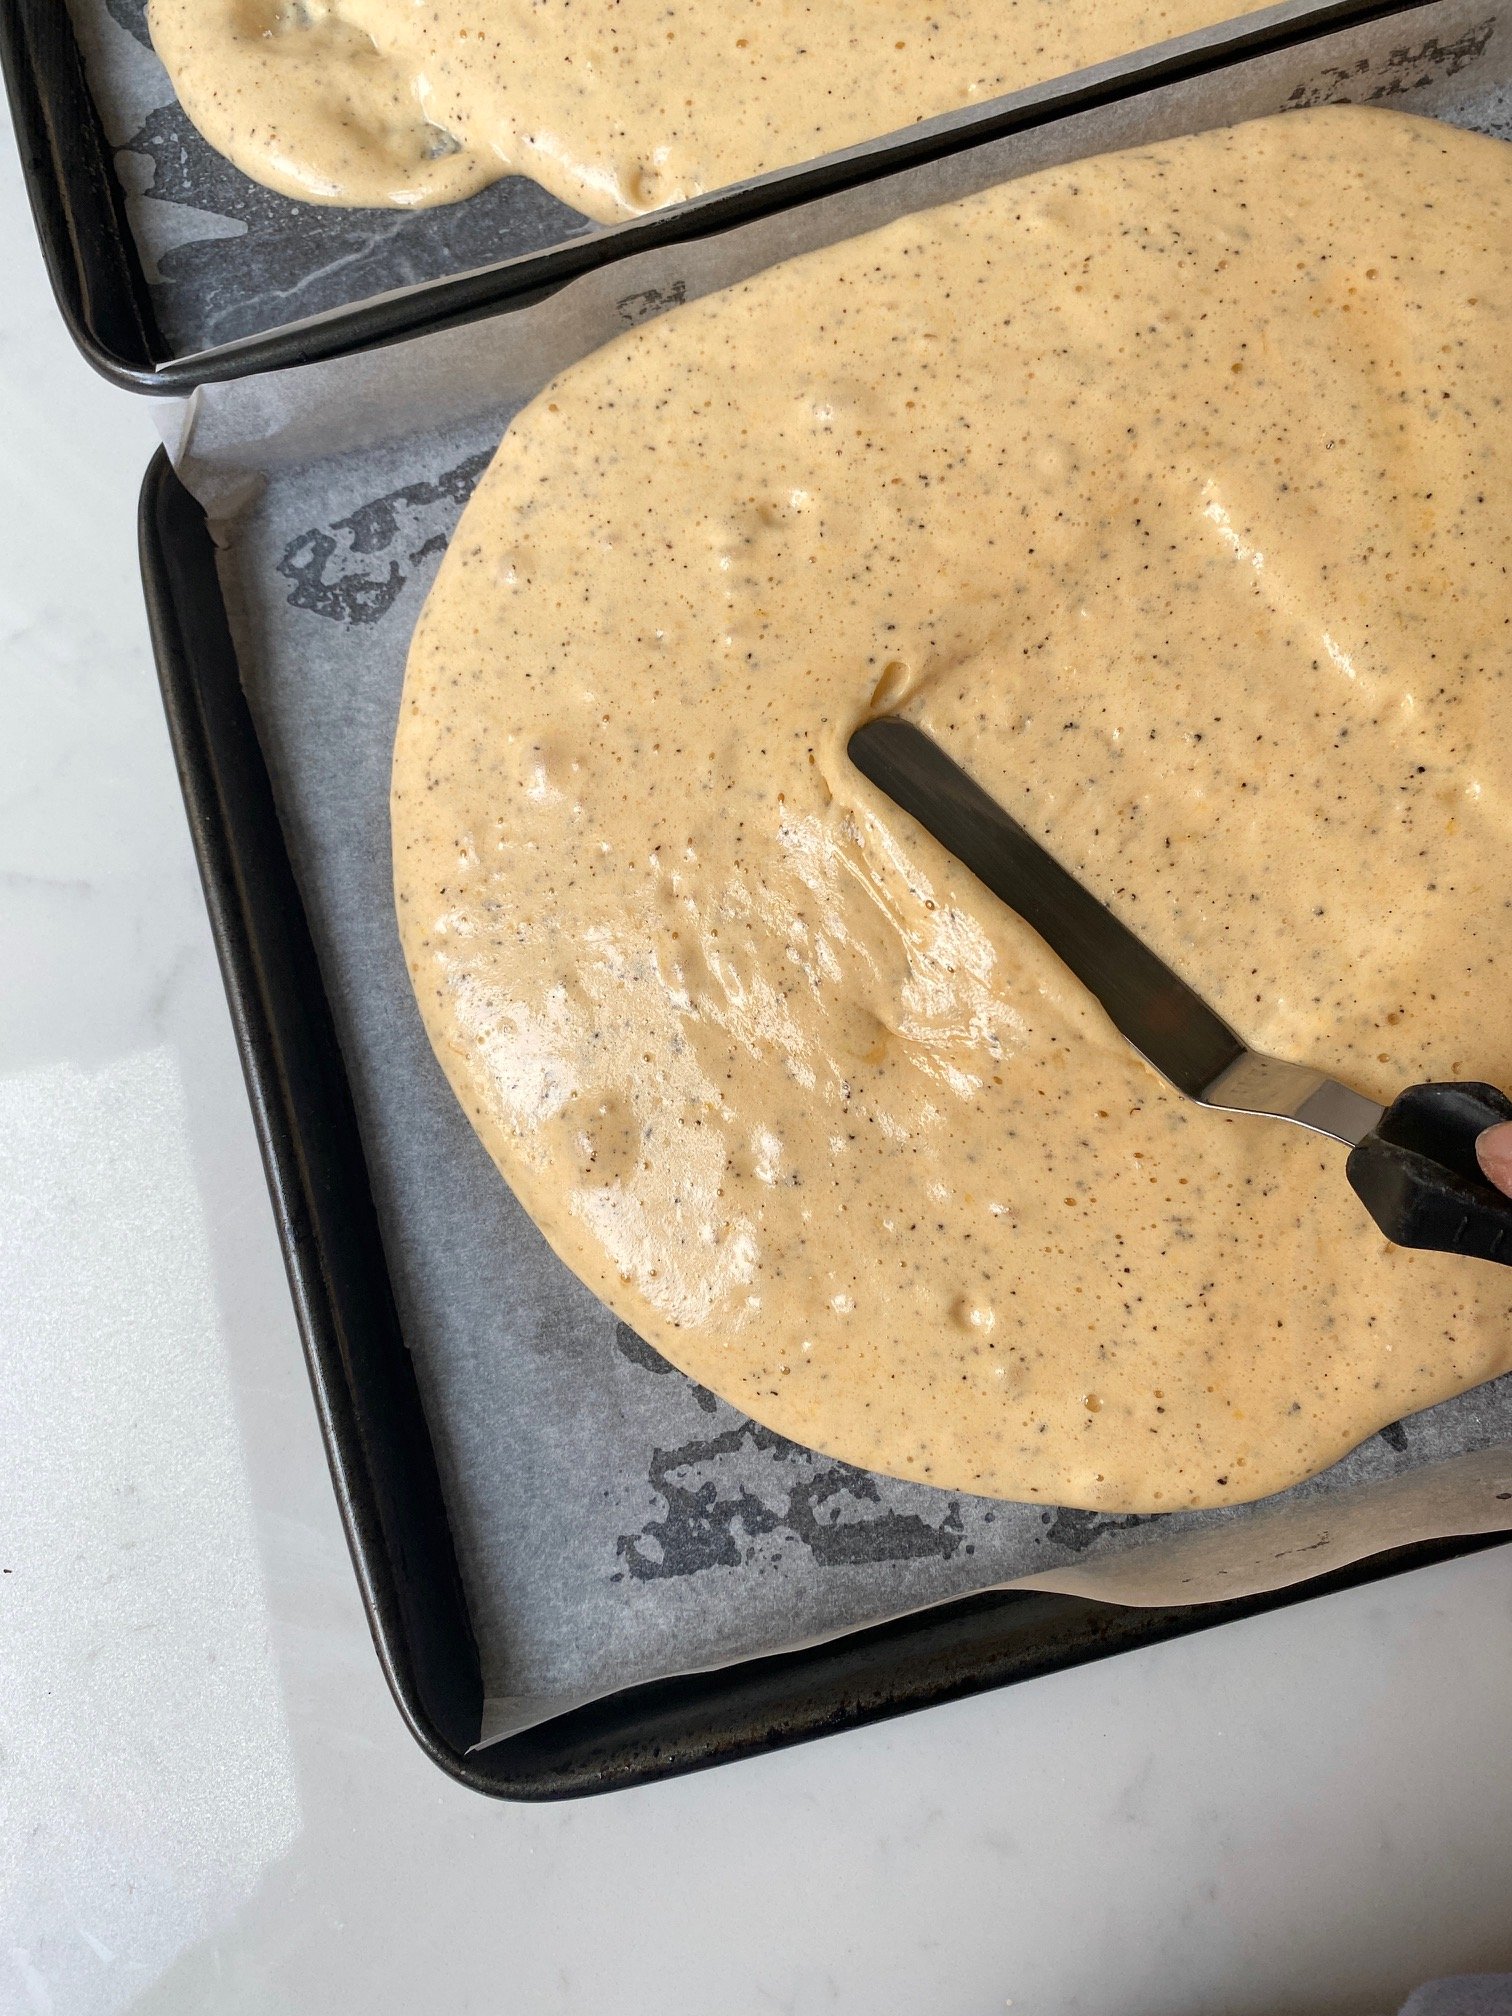
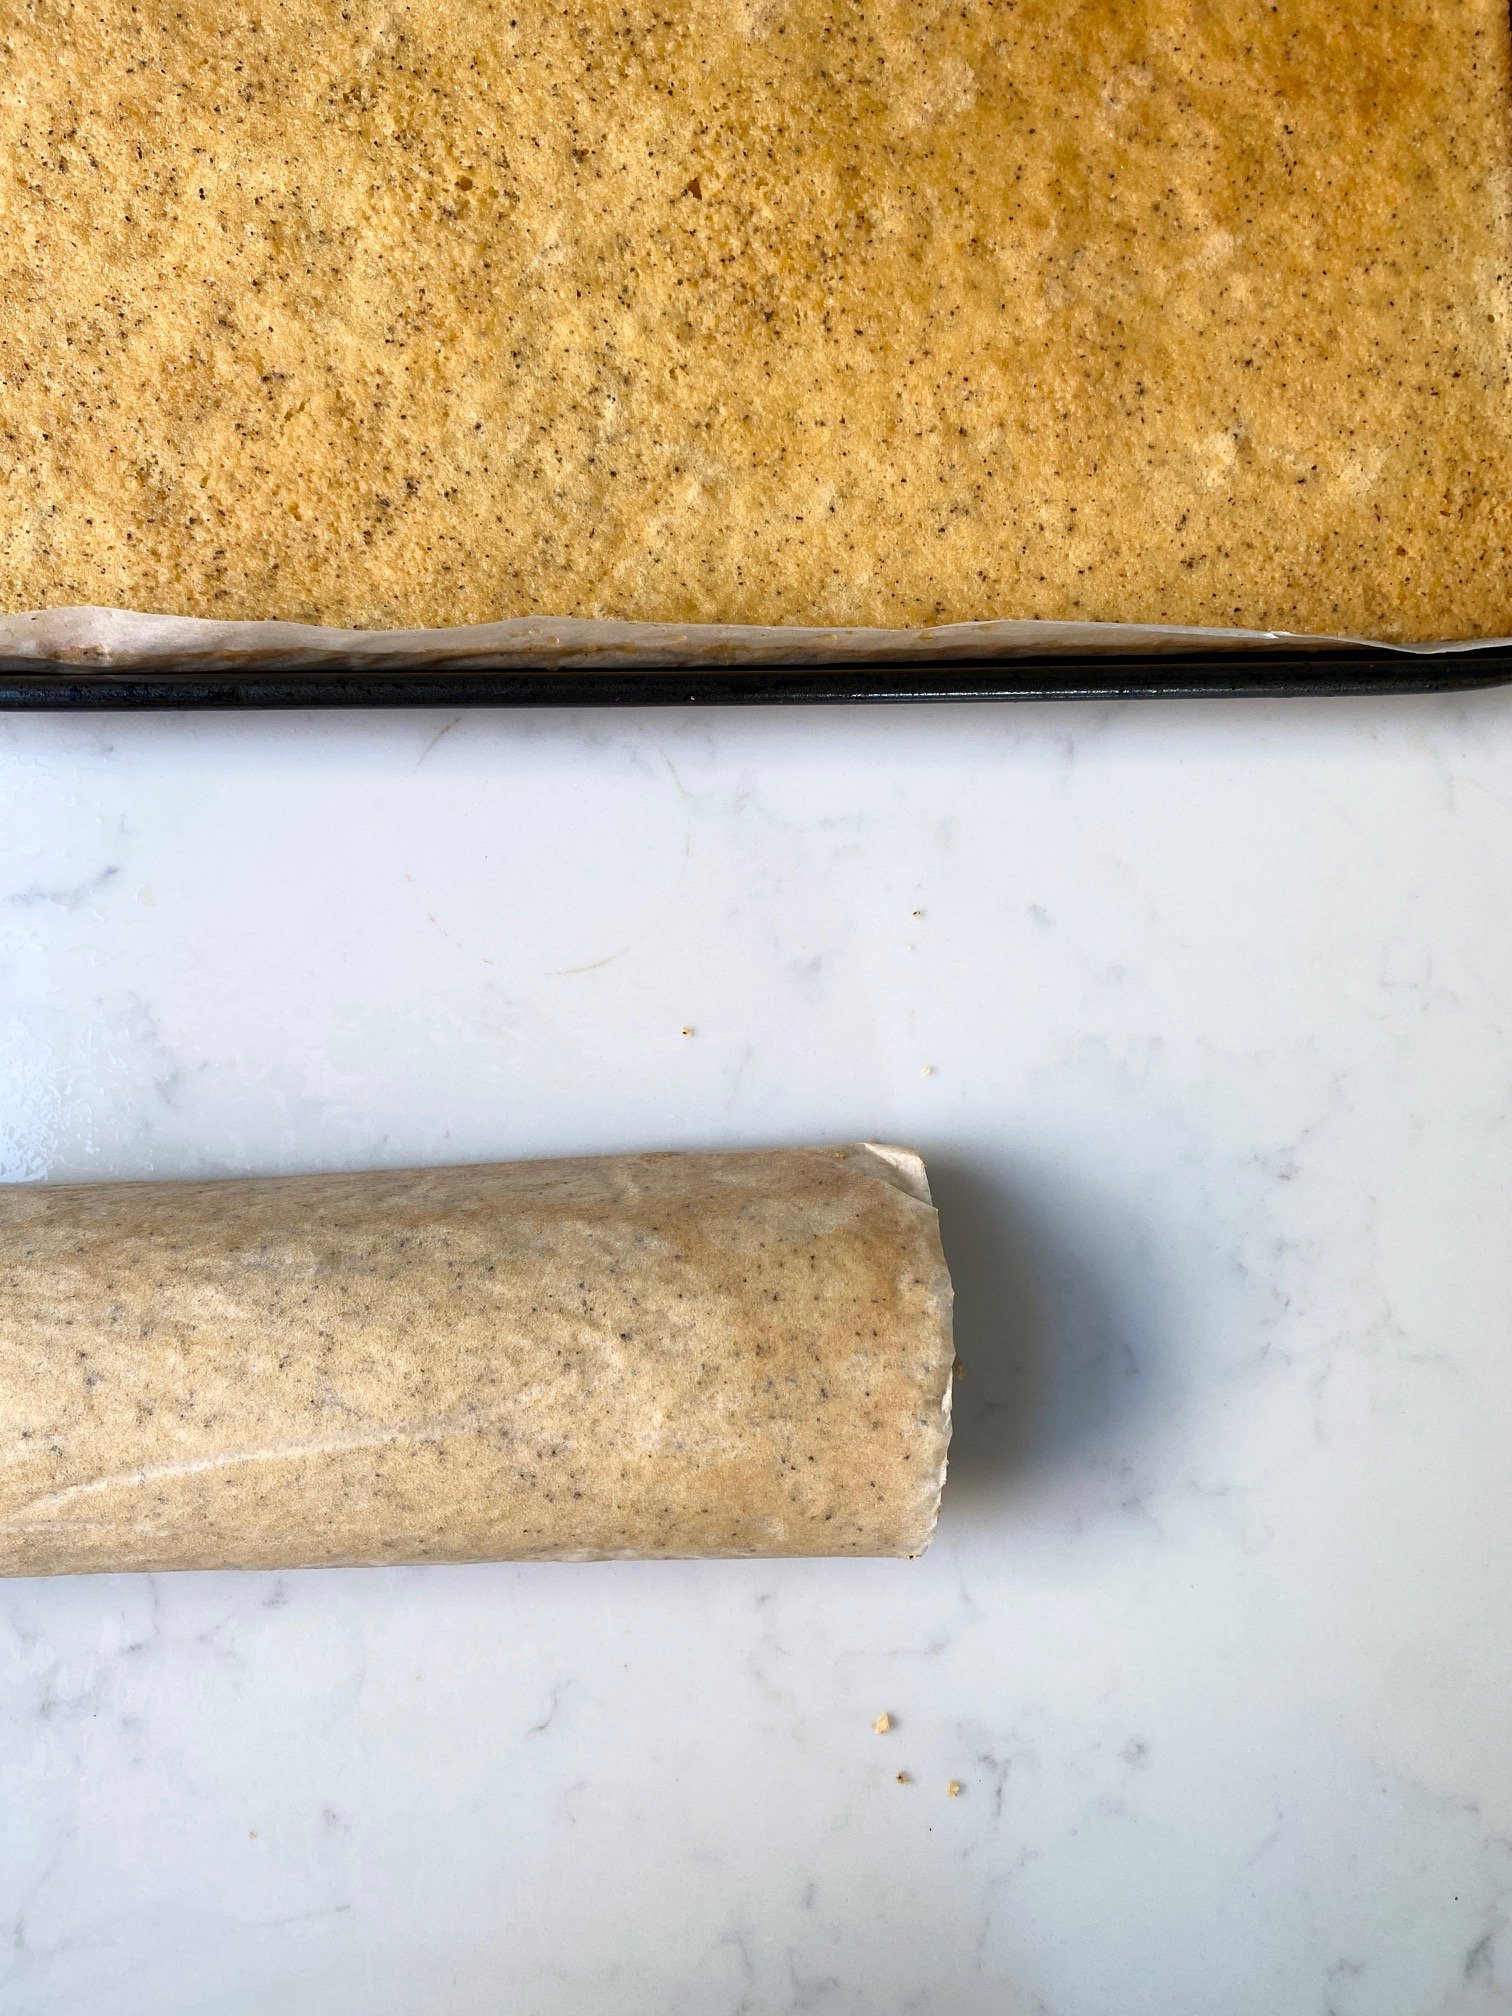
Once all of the flour is incorporated, divide the mixture evenly between your two baking trays, mine was approximately 360g per tray. Spread as evenly as possible and bake for 10 minutes, the sponge should spring back when you touch it.
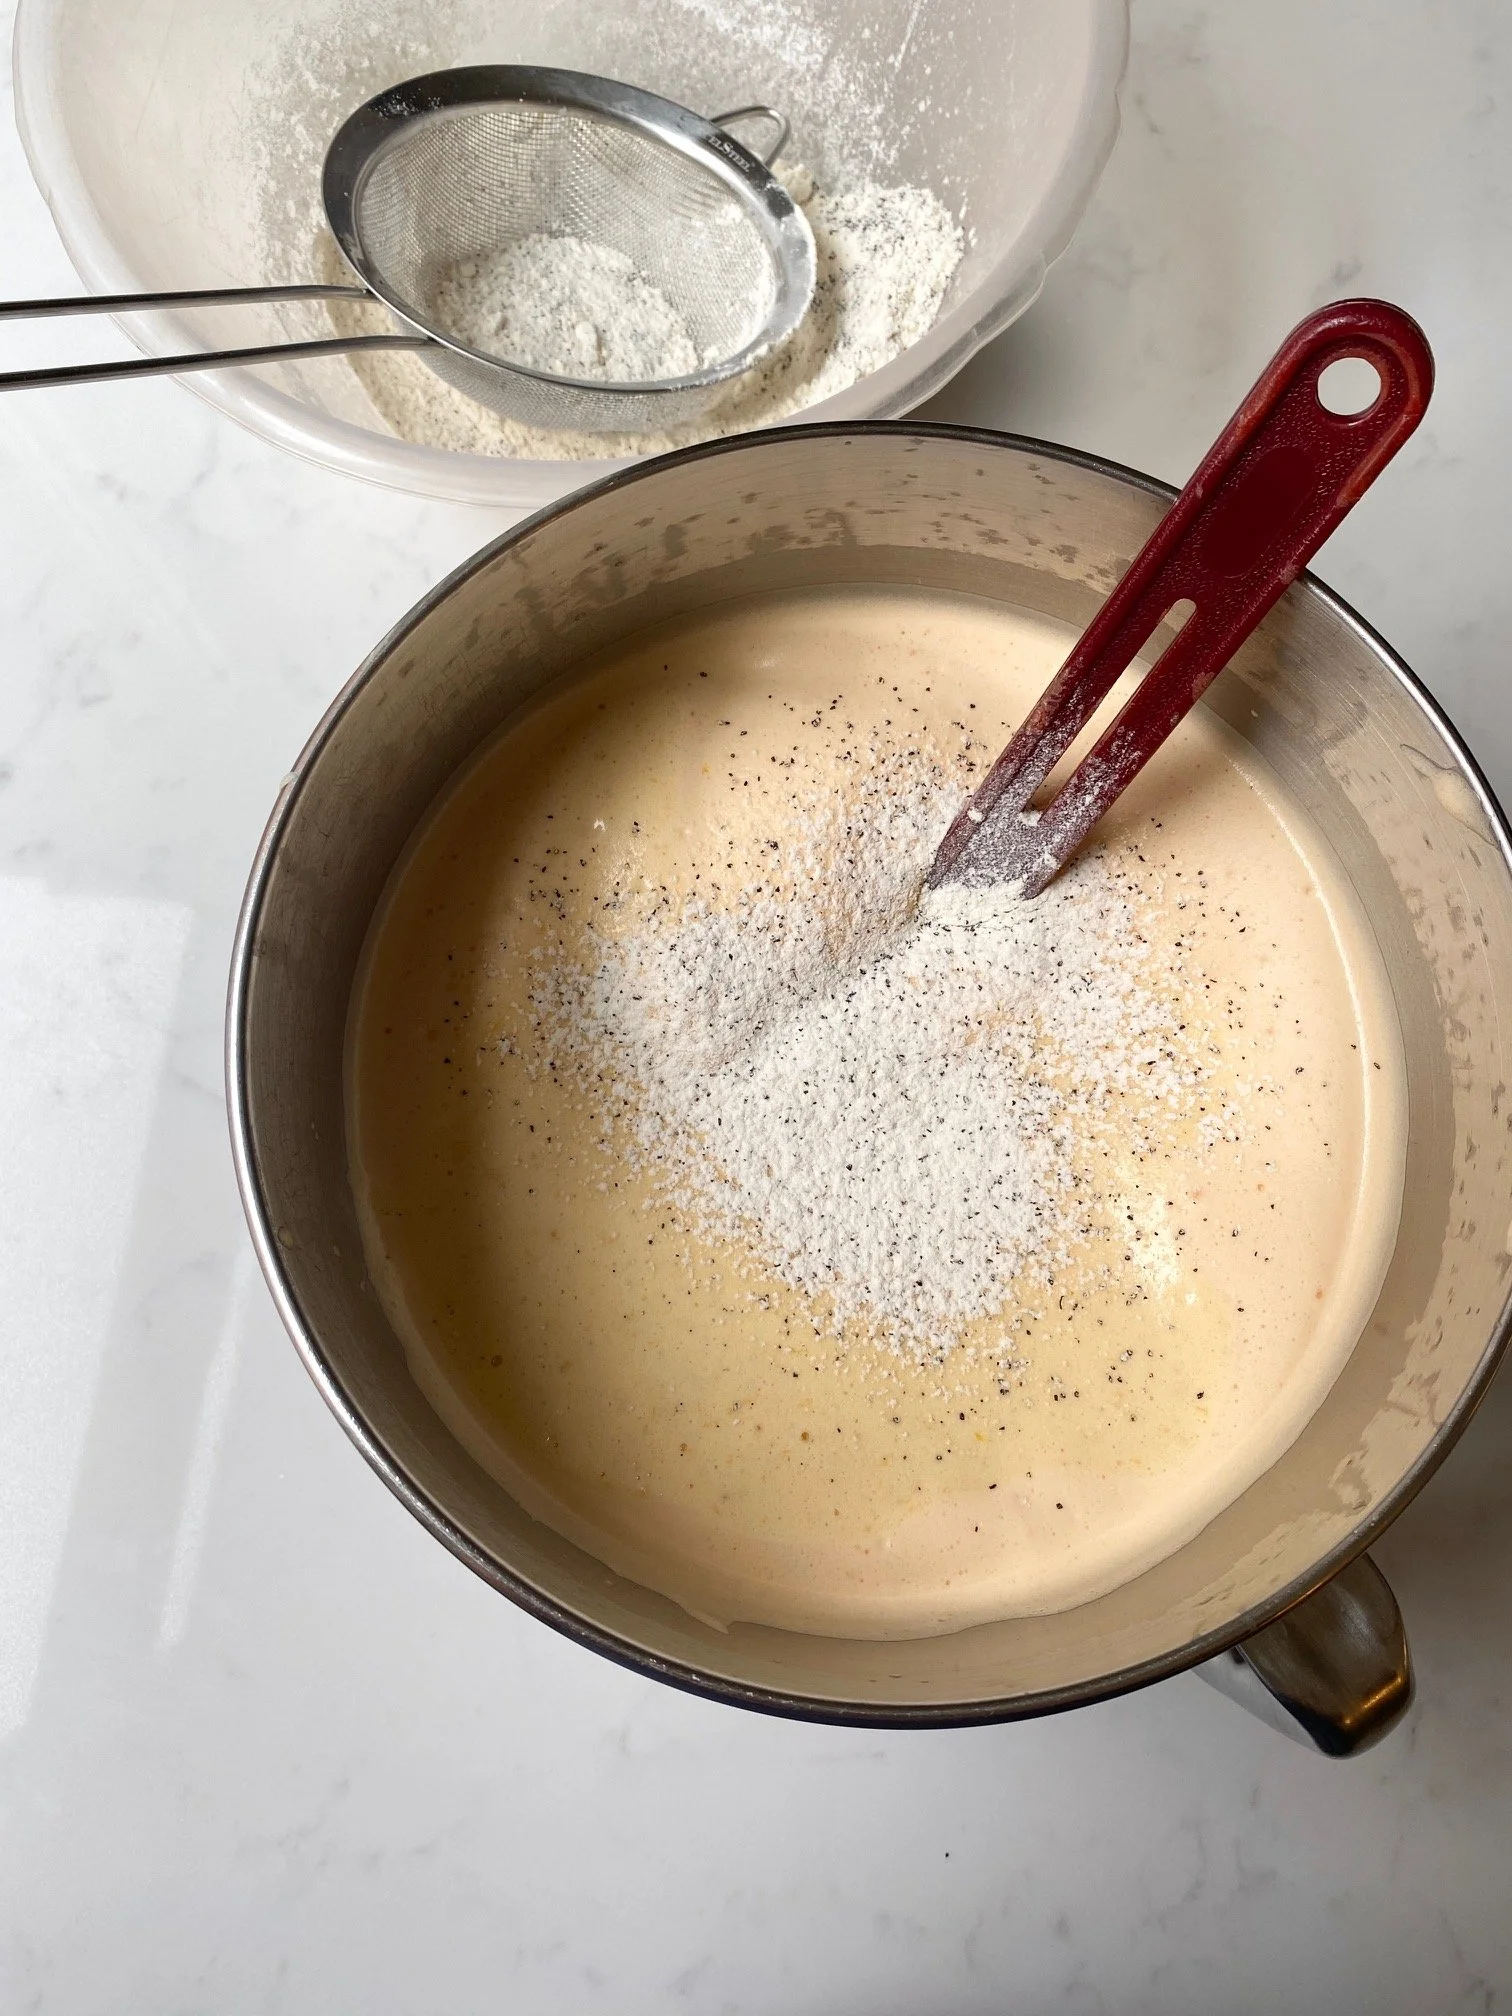
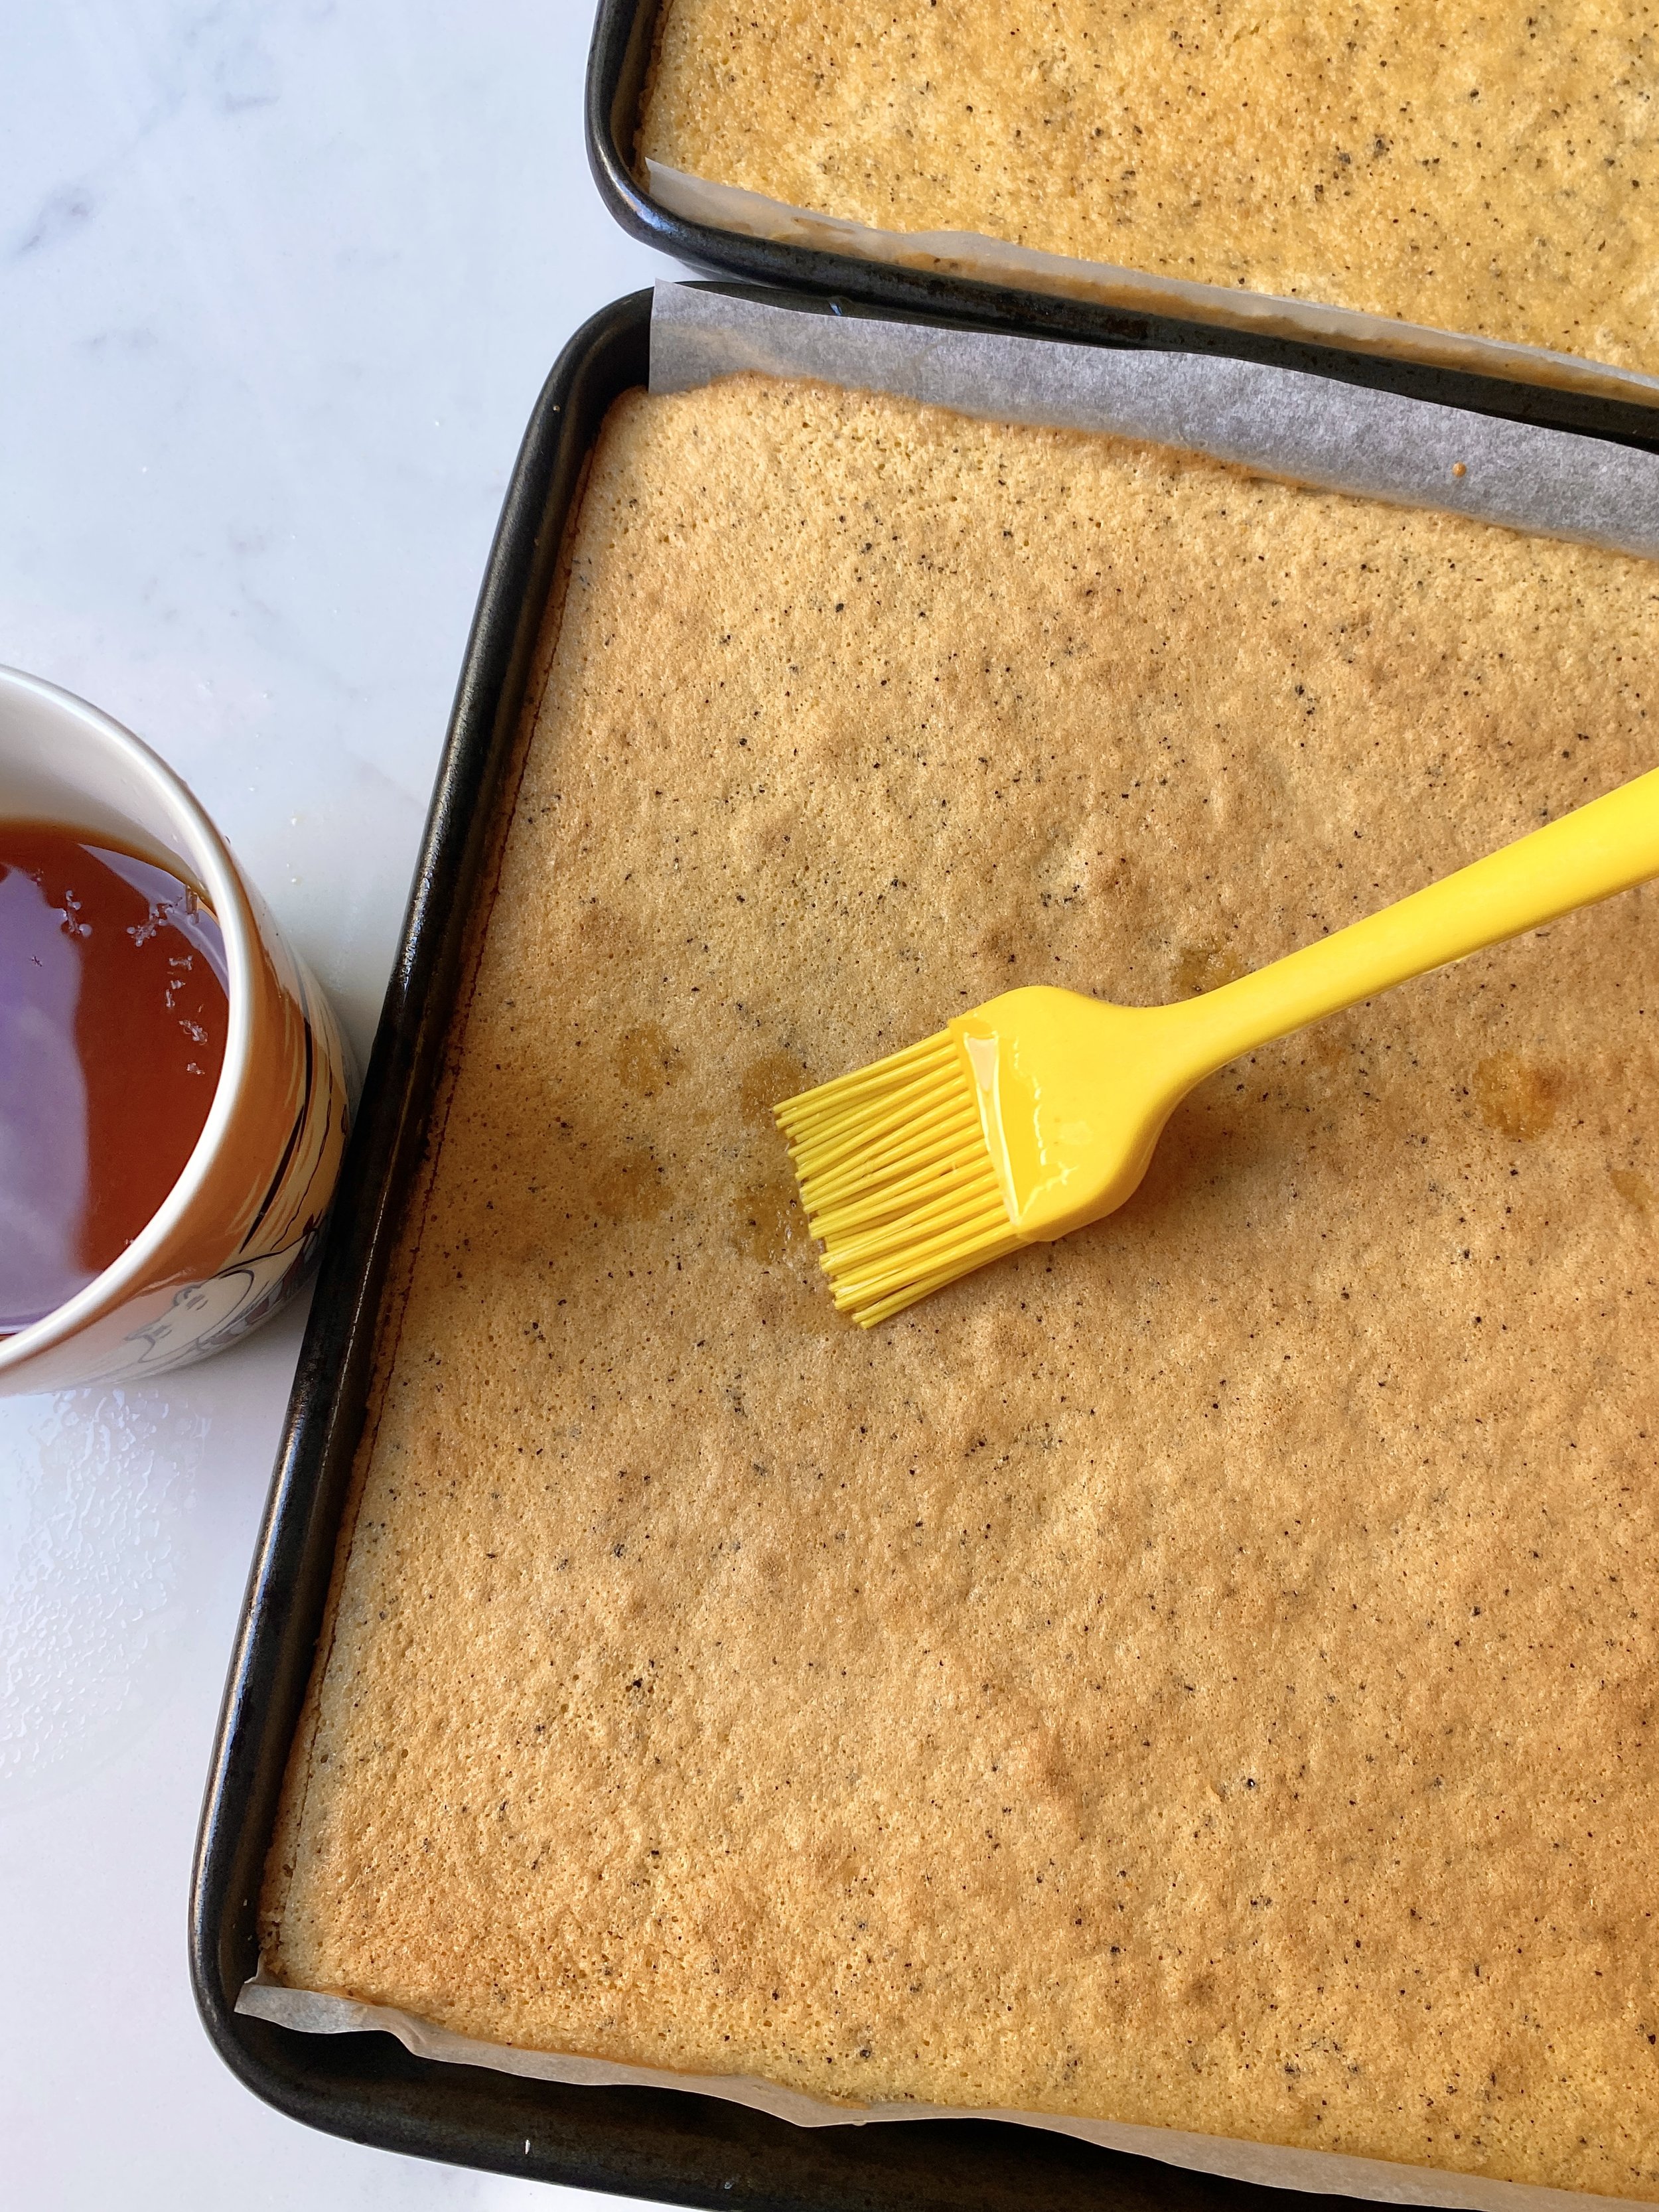
While the sponge is in the oven make the earl grey syrup, this is super easy and keeps the sponge lovely and moist. Weigh the sugar into a cup, add 100ml of freshly boiled water and an earl grey tea bag, stir until the sugar is fully dissolved and the tea is nice and strong, discard the teabag and add the juice of ½ a lemon (more if you like things on the sharp side).
When the sponge comes out of the oven brush it evenly and liberally with the earl grey syrup.
When cool enough to handle, remove one of the sponges, lay out landscape on your worktop, add a layer of parchment on top and then roll up, doing this warm prevents cracking, only one sponge needs to be rolled as it’s only the centre that needs the really tight spiral. Leave to cool.
Onto the blackcurrant buttercream. Start by boiling a pan of water (the one we left on the stove earlier), weigh the egg whites and sugar into a clean heatproof mixing bowl. Whisk over the pan of simmering water until the mixture reaches 70c (hot to the touch) and the sugar is fully dissolved, transfer to the mixer and whisk on high until the meringue has reached stiff peaks and is cool. Slowly add in the softened butter and continue whisking until the butter is fully incorporated the buttercream is silky and fluffy, it’s important to give it a really good whisk at this point to avoid a dense and buttery buttercream. Once you’re happy with the consistency, add the puree and rose water and whisk well, at this stage it can split, don't worry, just keep whisking!
Assembly
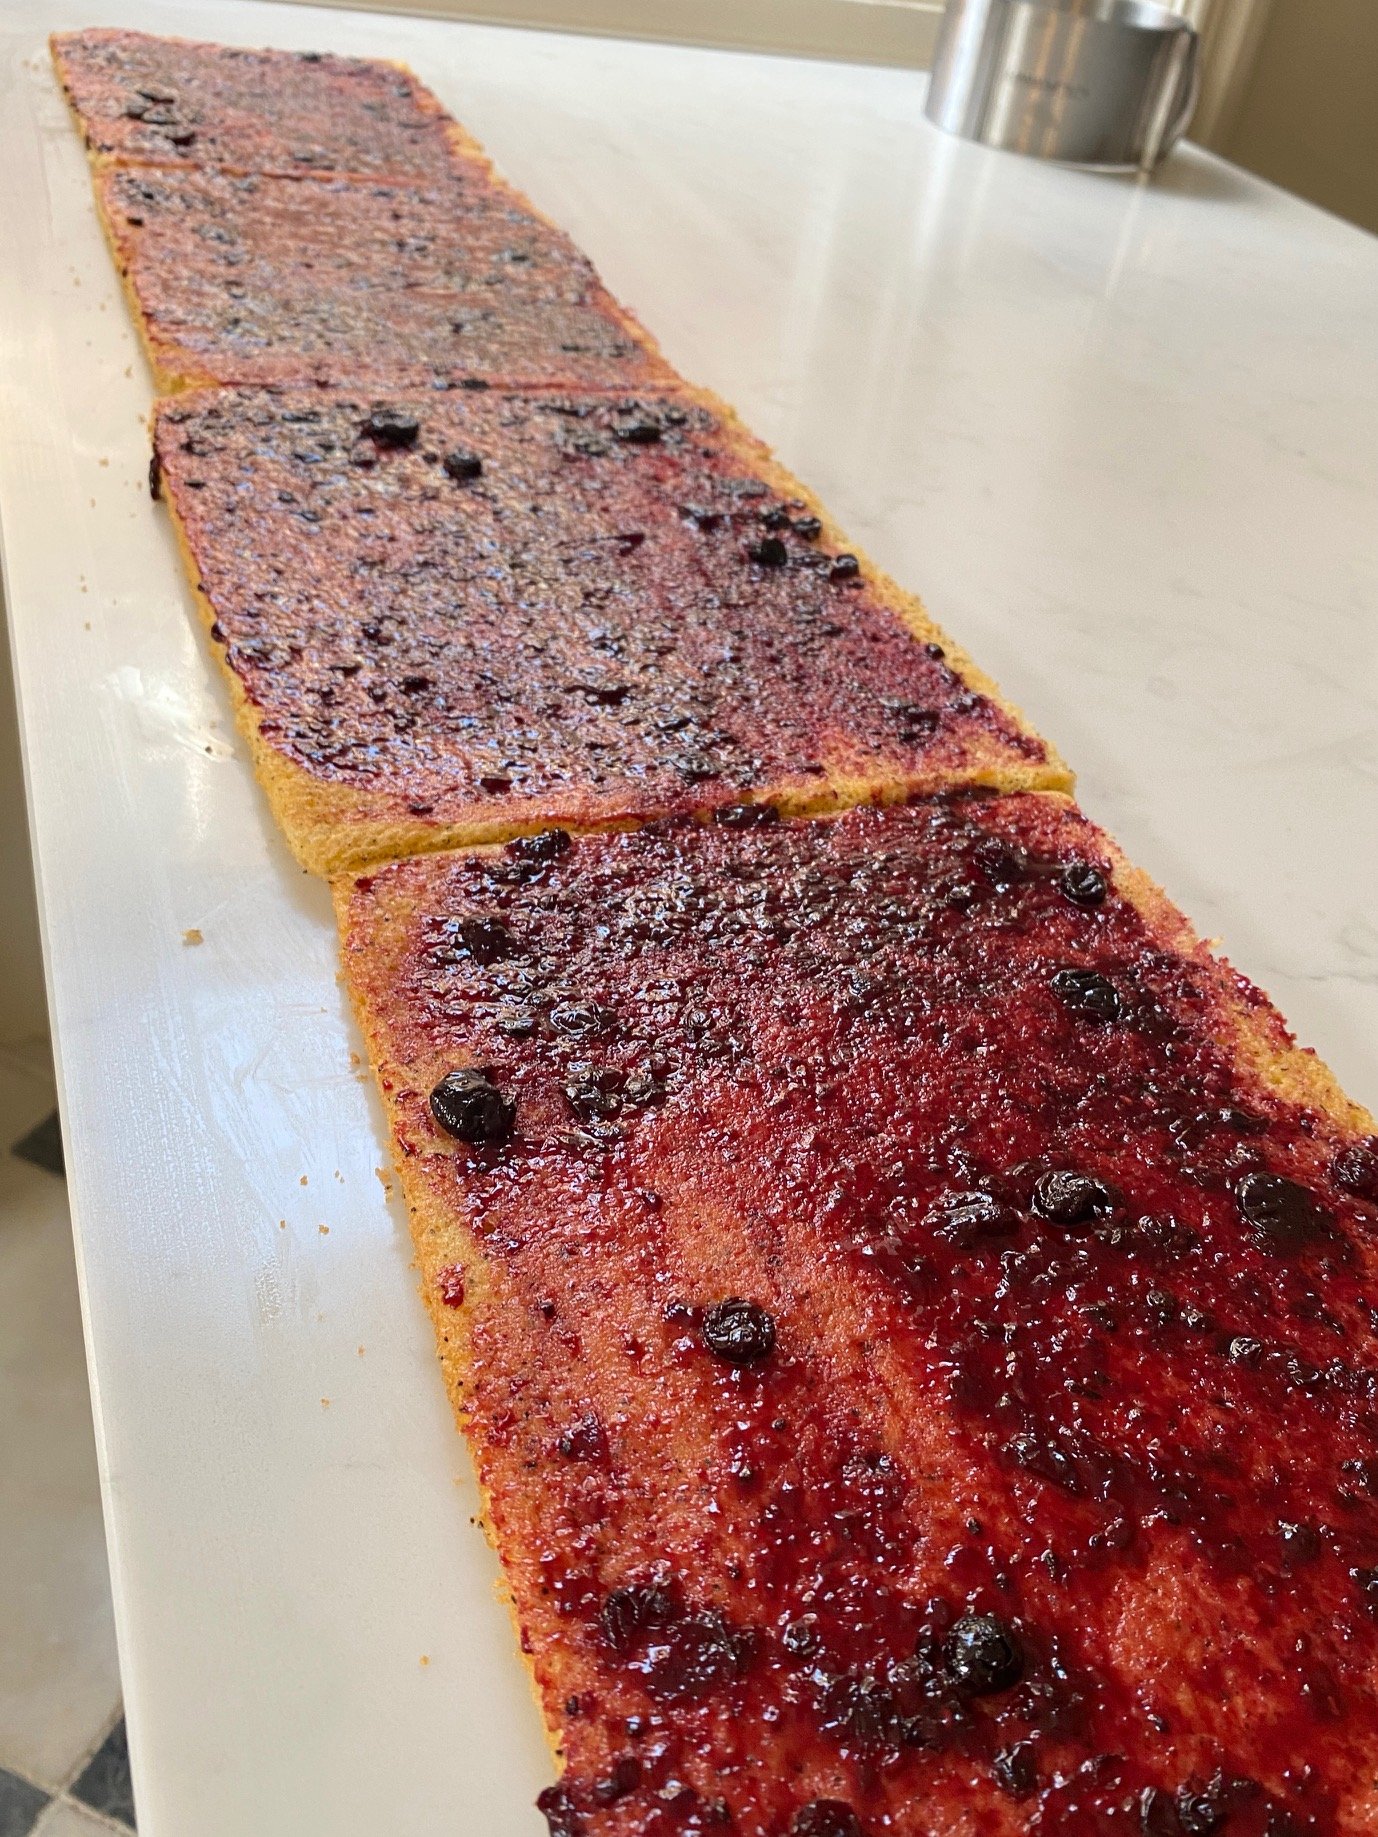
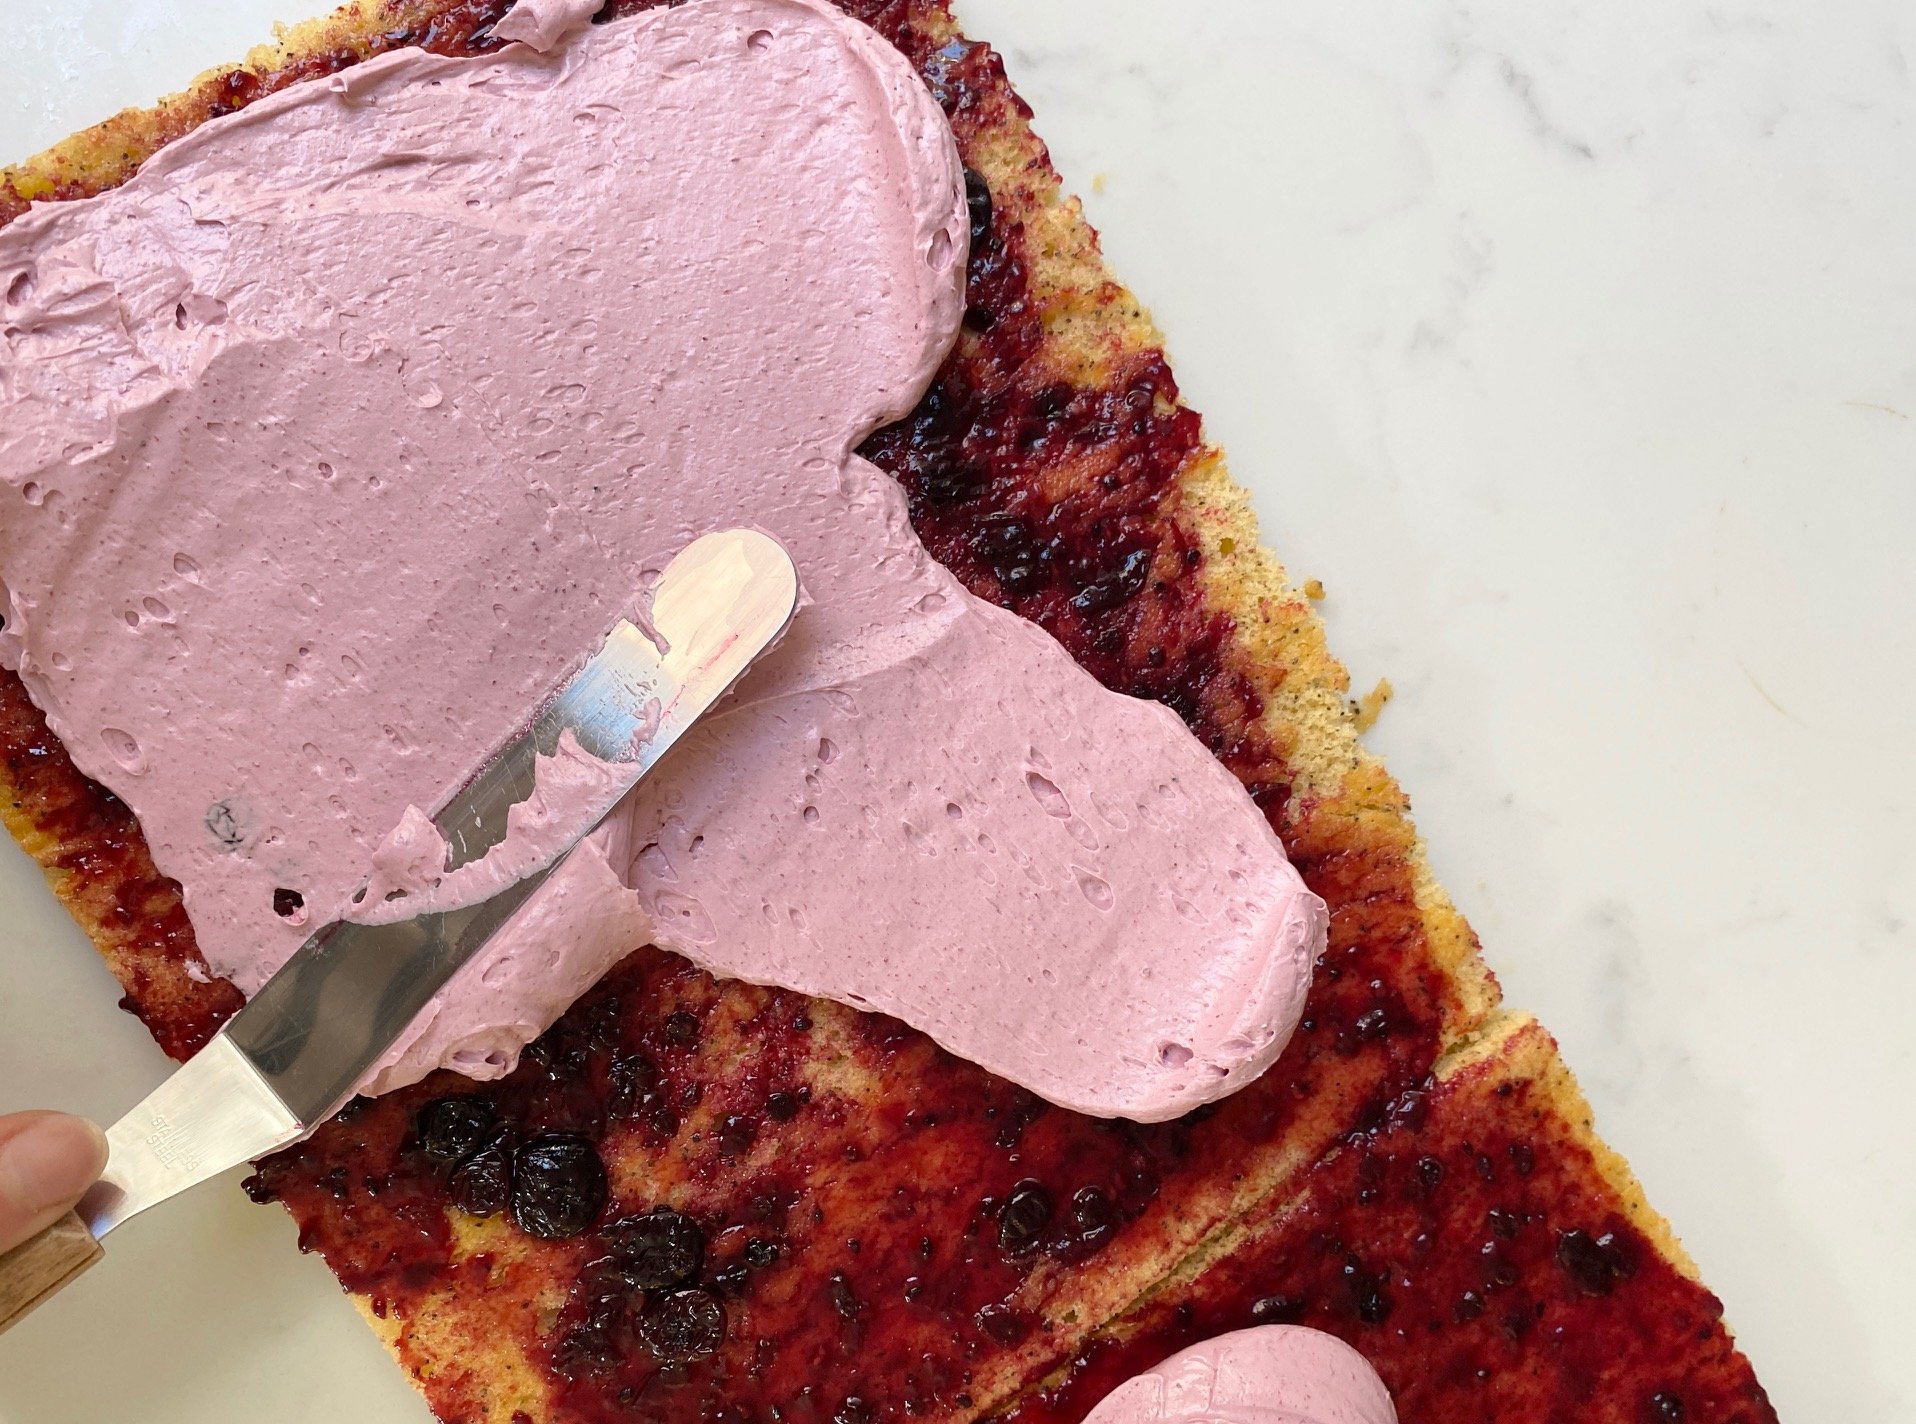
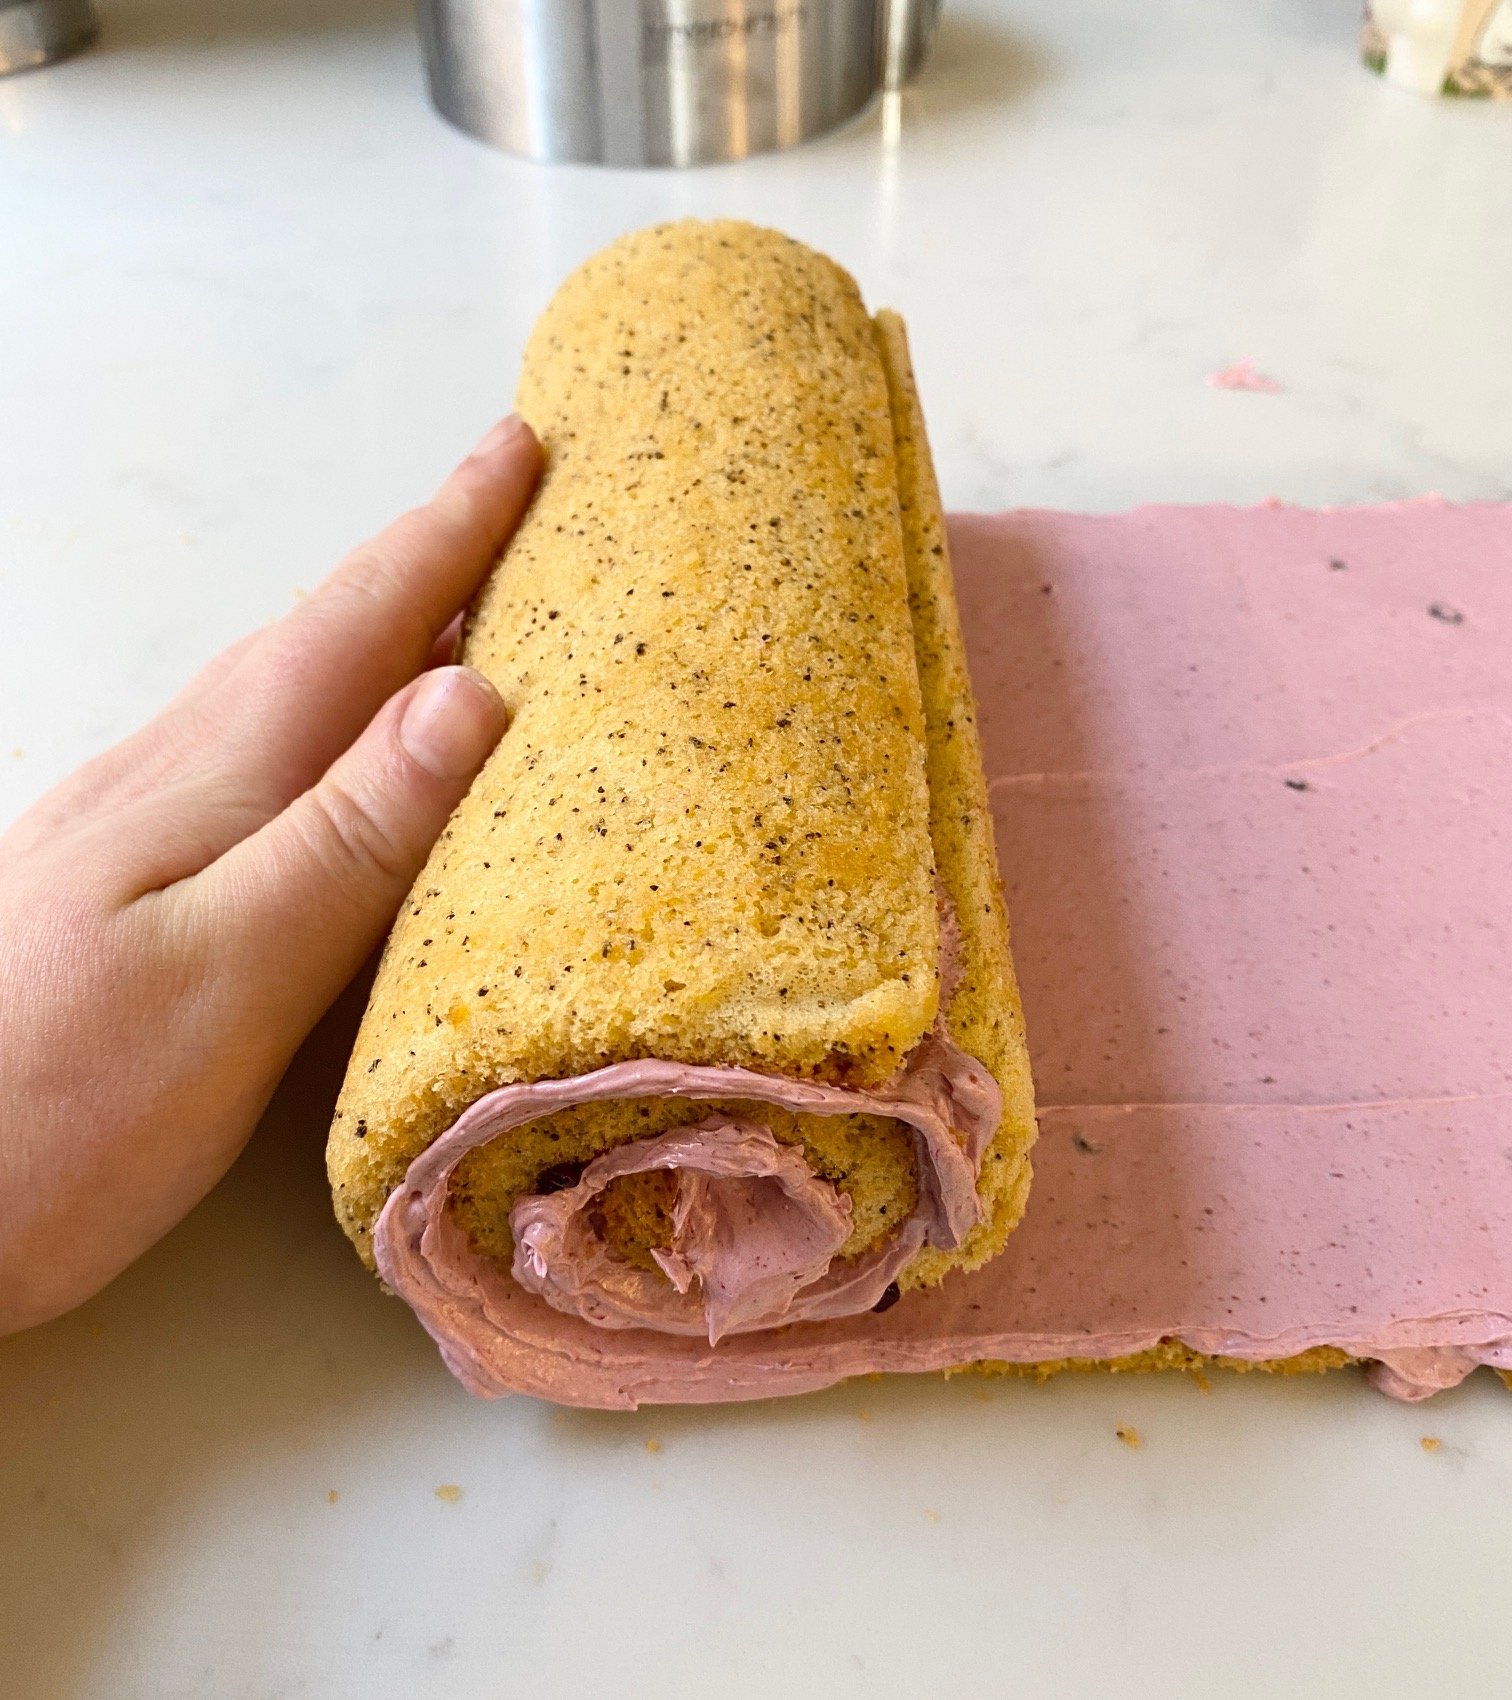
To start, cut the rolled sponge in half, unroll and rotate 90 degrees, lay out next to each other, cut the unrolled sponge in half and lay out in a long line (see picture). Next spread a thin layer of jam over all 4 sponges, don’t get carried away with the jam or it’ll make the rolling much more difficult! Spread ⅔ of the buttercream evenly over the sponges, leaving about a 1cm gap at the far left where the roll will start. Now we roll! Roll from left to right, confidence is key, don’t let the sponge know you’re scared of it, just roll it as smoothly and as tightly as possible. Once you get to the end you’ll have a giant swiss roll, if needed trim either end and then flip and stand on a cake board/plate. Chill in the fridge for at least an hour before decorating.
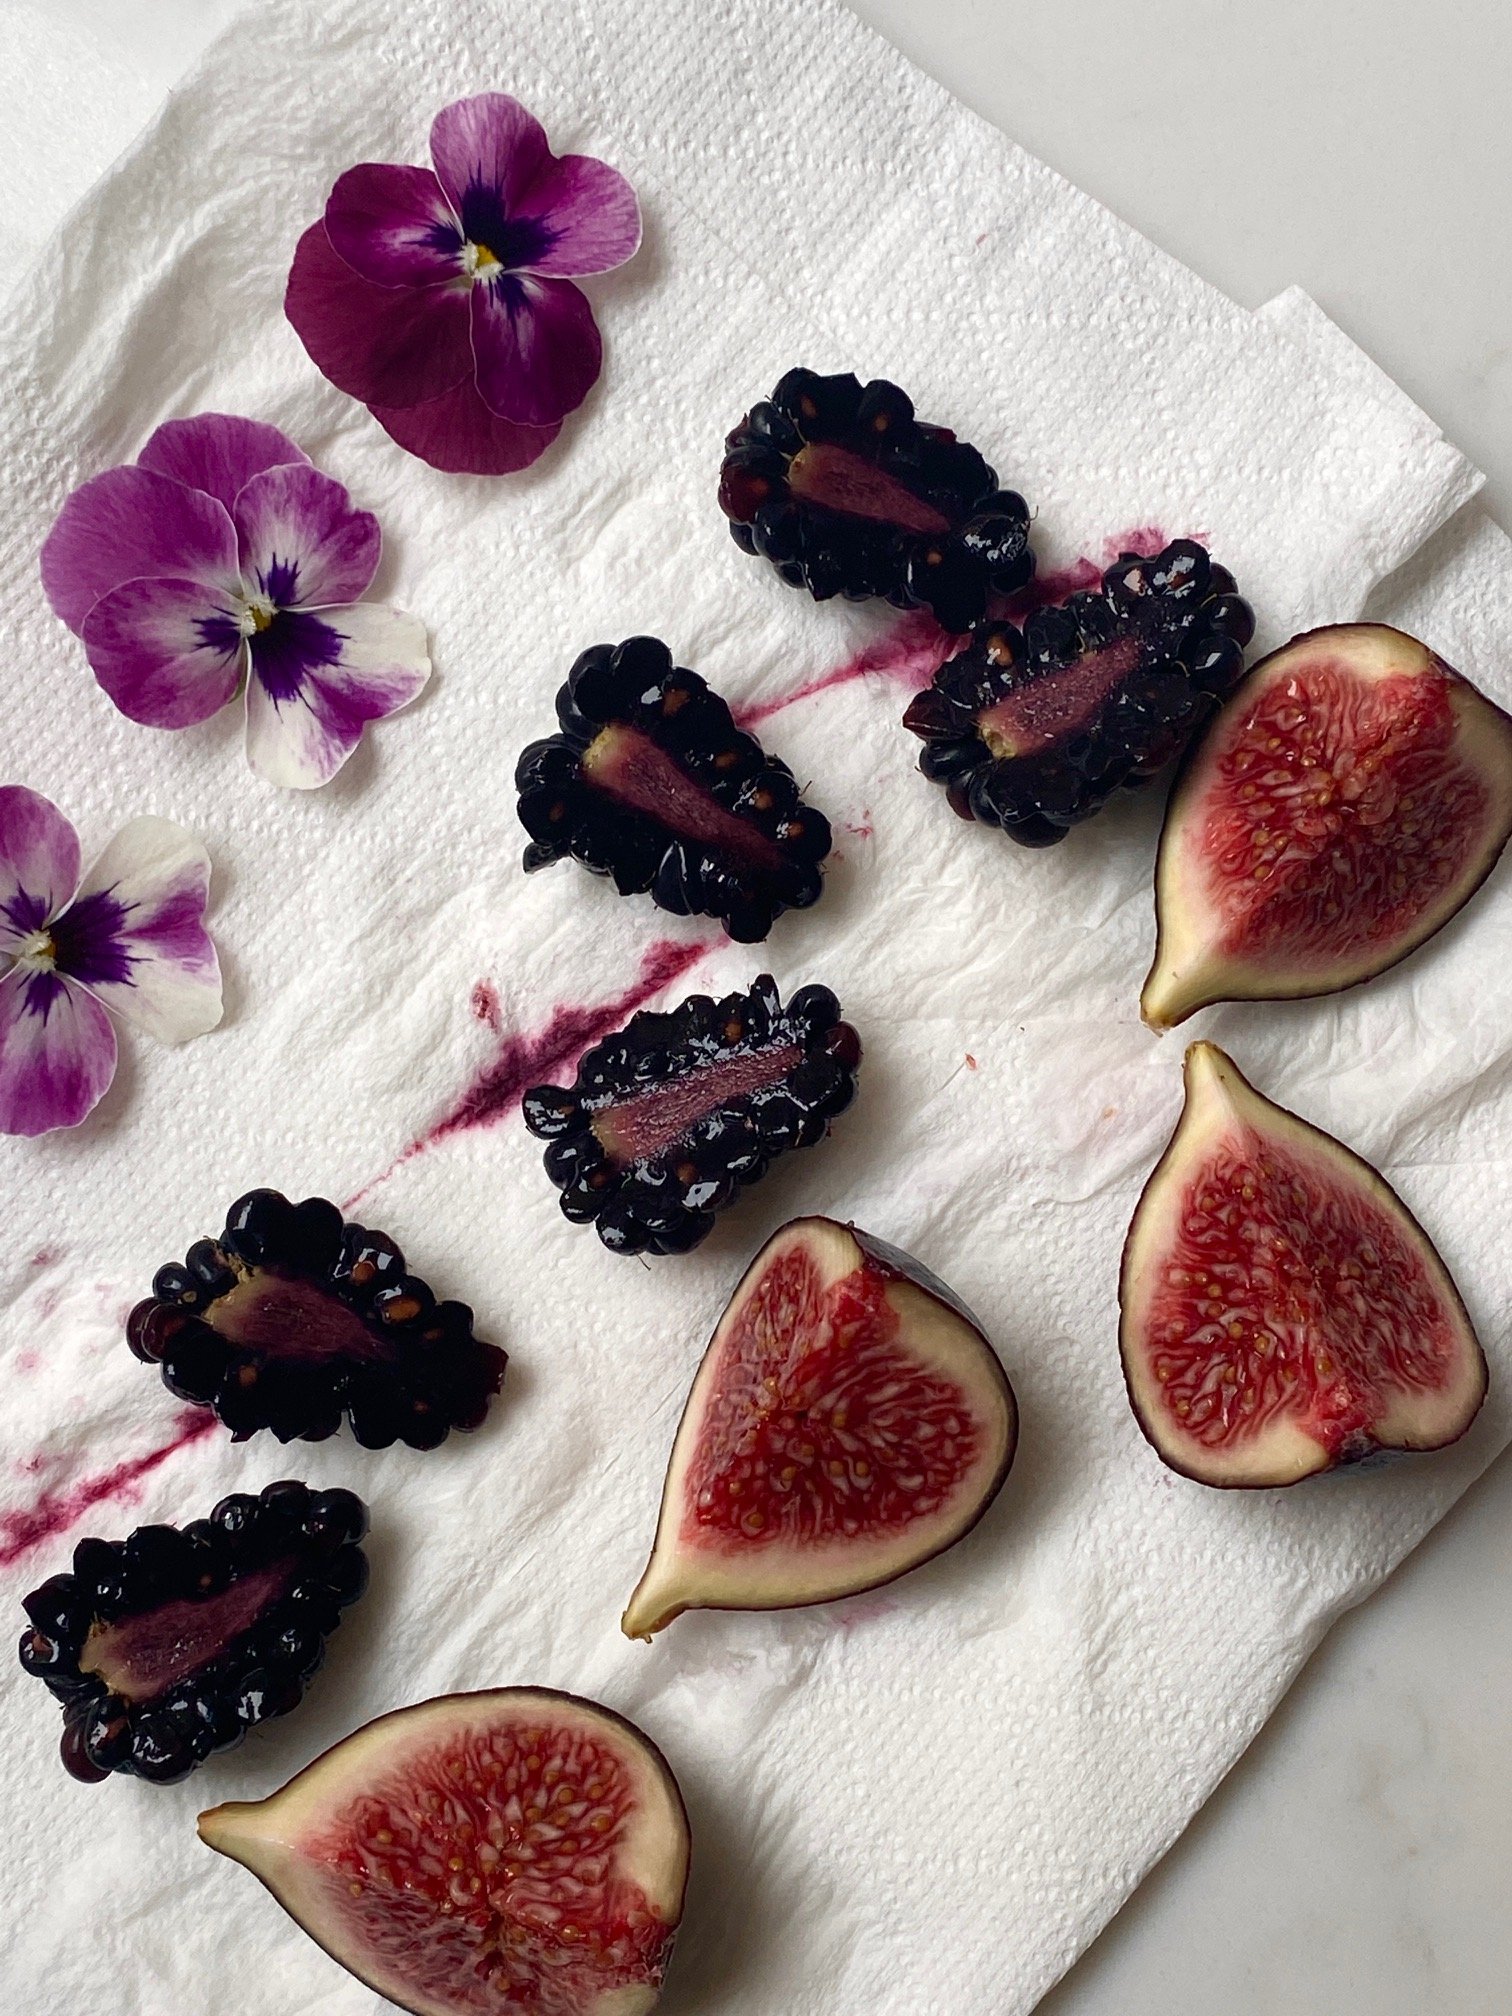
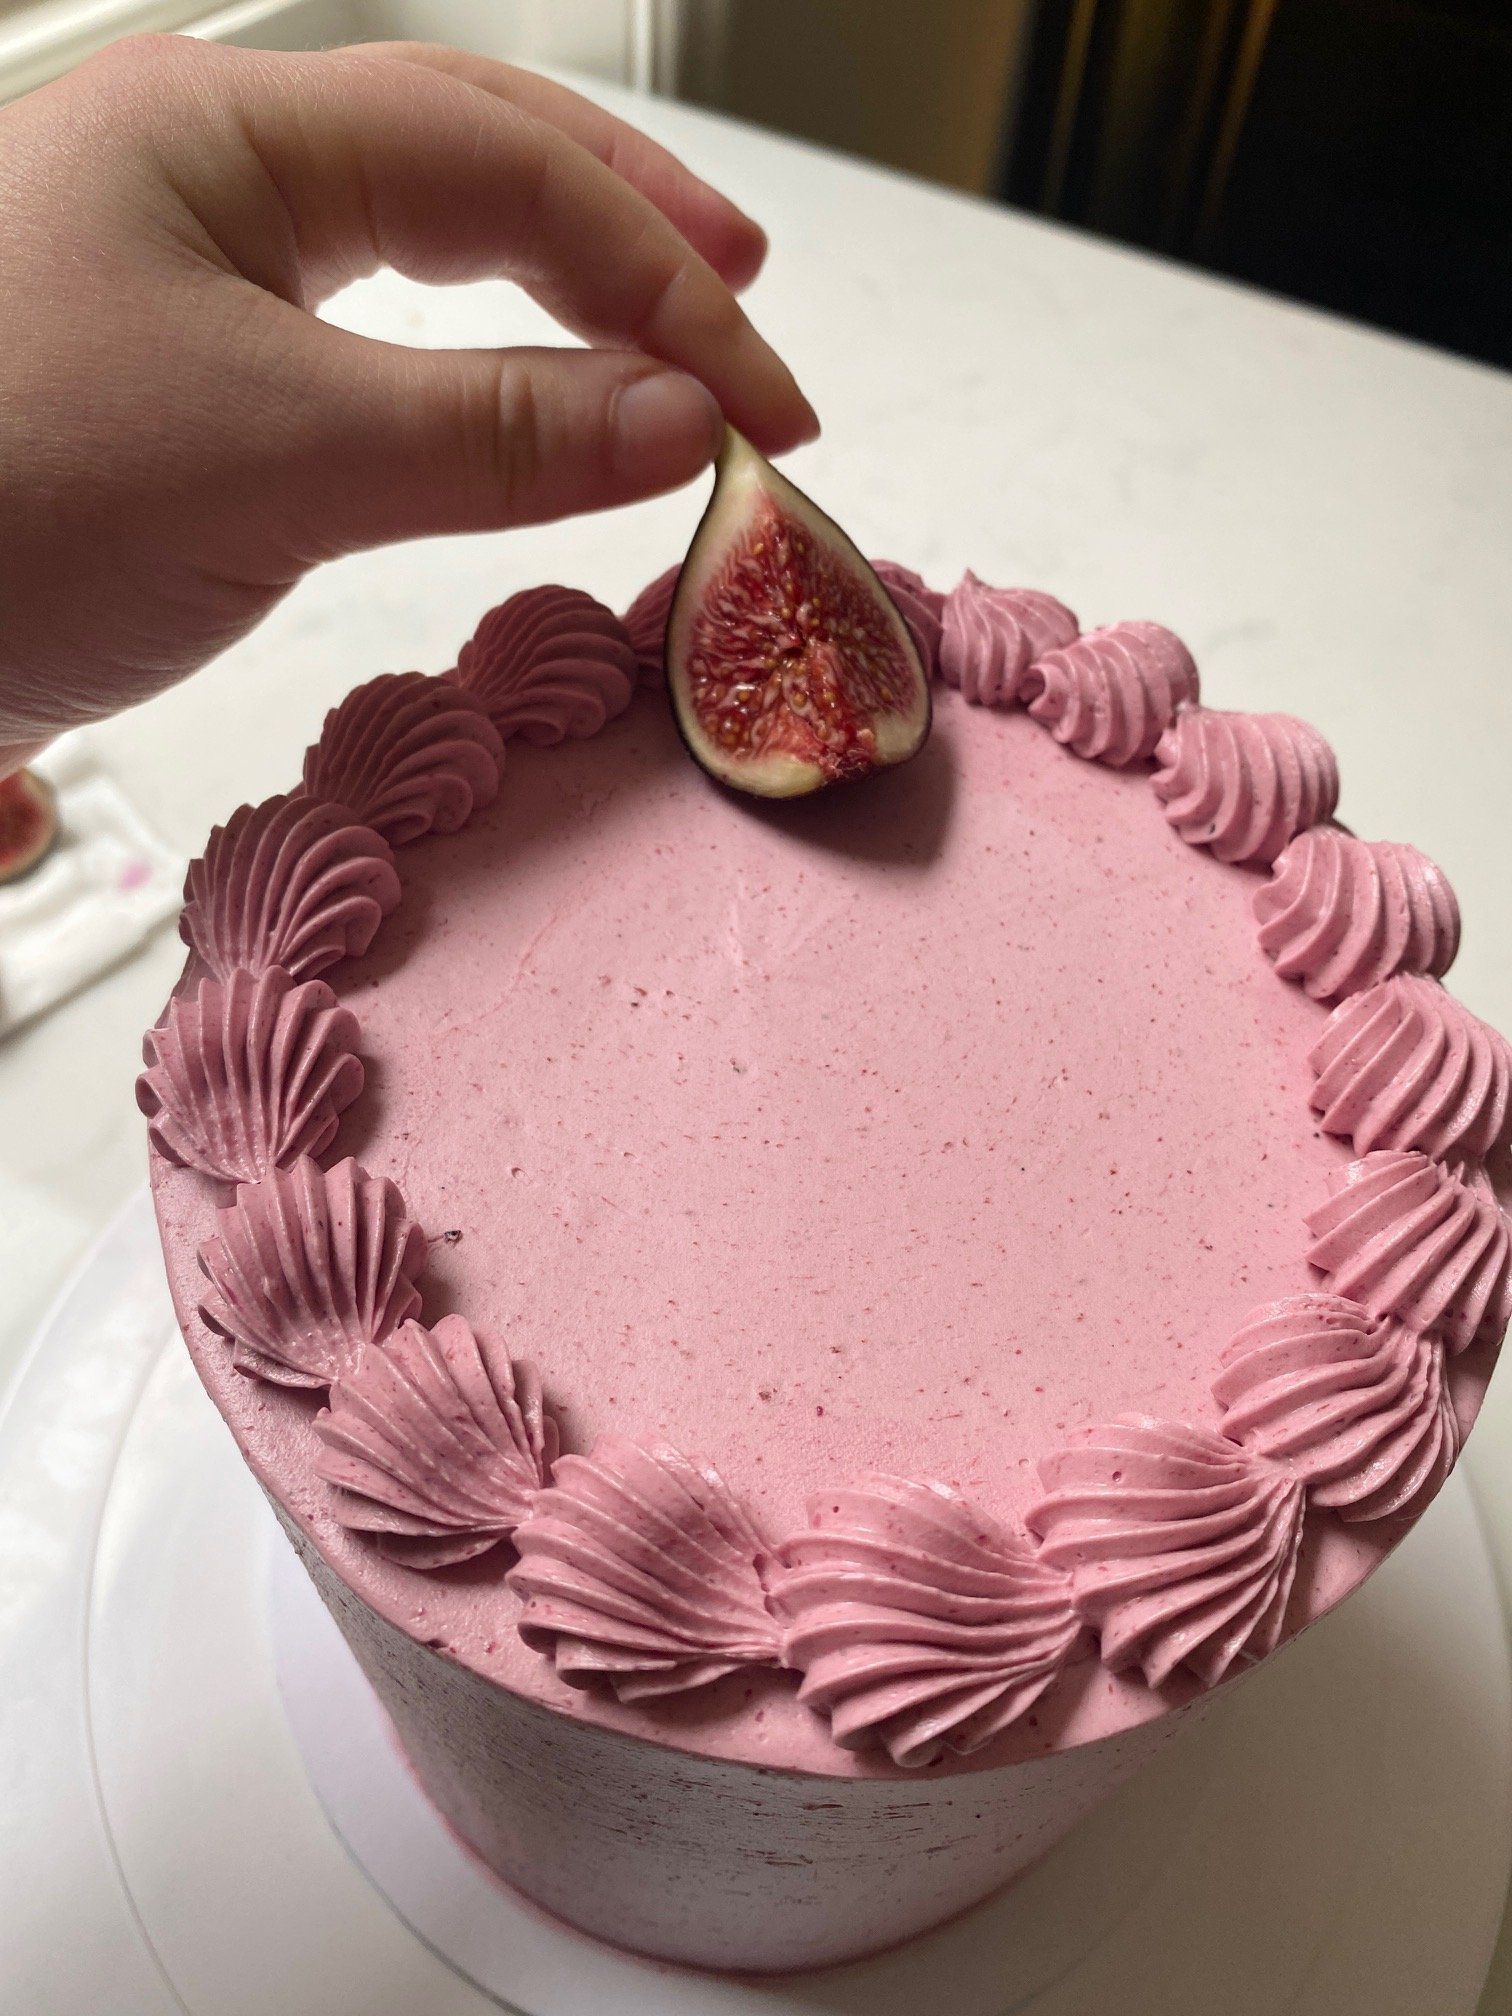
Once chilled, decorate with the remaining buttercream*, I used some fresh seasonal fruits and edible flowers. Onto the final step; cut and feel incredibly smug about those beautiful vertical stripes and then devour.
*I haven’t included detailed decoration instructions in this post I’ll save that for another day!


